Tubelab 3 is finished!
I have been building audio amplifiers, both tube and solid state, for over 40 years. Several of my associates also build amps. We all came to the conclusion that the mechanical aspects of amp fabrication took up 80% of the construction time. That is fine when you are building an amplifier design that is known to work. What do you do when you want to test out an idea, or how do you try out that weird circuit that you found on the web. After spending thousands of hours punching and drilling chassis, mounting tube sockets and transformers only to find out that the design sounds terrible, I realized that I needed a better prototyping method. The Tubelab was born.
The original Tubelab consisted of a few tube sockets and some transformers screwed to a piece of wood with sheetrock screws. All interconnections were made with alligator clip leads. This was not optimum from a safety, esthetics, or sound quality standpoint. Nevertheless several good amplifiers sprang to life from these crude beginnings.
The second generation Tubelab 2 was constructed from PC board material with pre-mounted tube sockets and fahenstock clips for components. Interconnections are made with short pieces of wire. This arrangement worked much better, however the fixed mounting of the tube sockets limited design flexibility.
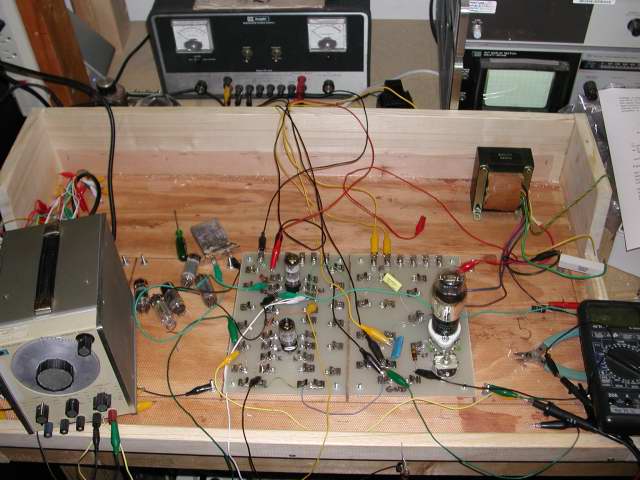
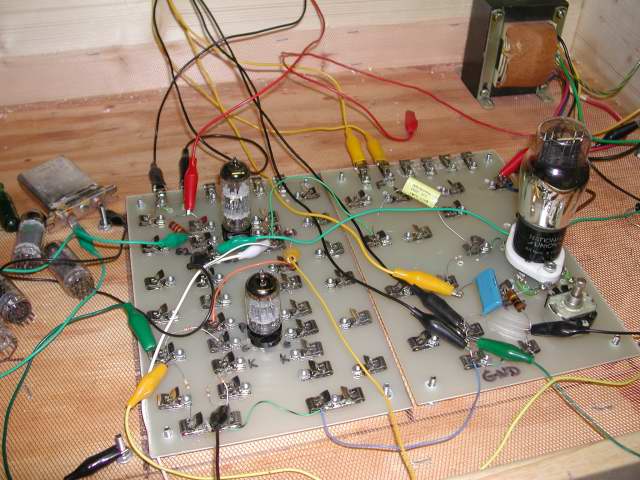 A Single Ended 45 Amplifier being developed on Tubelab 2
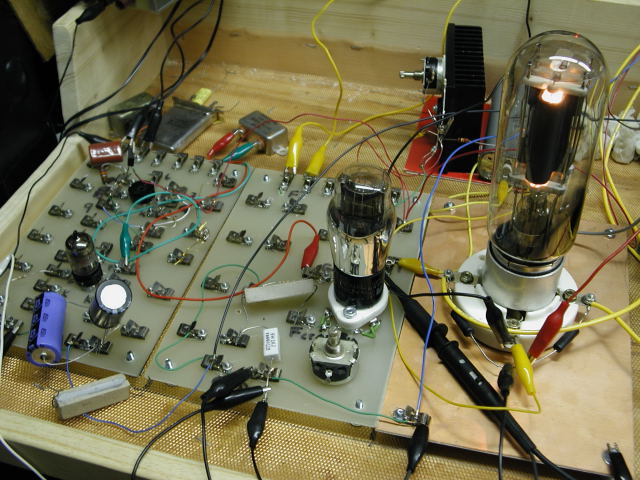 The 845SE being developed on Tubelab 2
The third generation Tubelab 3 is FINISHED! Tubelab 2 is now scrap. What is so cool about Tubelab 3? There are no PC boards, and no unique parts. I built it with parts from Home Depot and Radio Shack. It has far less exposed electricity since the metal clips have been eliminated.
The Tubelab is an indispensable tool for rapid prototyping vacuum tube circuits. An entire amplifier can be built without ever picking up a soldering iron or a chassis punch. Component changes or "tweaks" can be made in minutes. With the modular design in Tubelab 3 an entire stage can be swapped out in 5 minutes. Which sounds better in a particular design, a 6SN7 or a 6922 - 6DJ8 ? Just change the module and see. Is this the ultimate tweaker's amp? In short, no. The Tubelab is meant to be a prototype development environment for use by qualified individuals as a means to achieve their own ultimate design in the shortest possible time. The exposed circuitry is too dangerous to use as an every day amp, and the unshielded nature of the Tubelab will never yield the quietest possible design. Since everything is spread out in essentially two dimensions even simple designs can become quite large. The individual modules used in Tubelab 3 are smaller than Tubelab 2 so the entire Tubelab is smaller, and it is now possible to build a two channel amp.
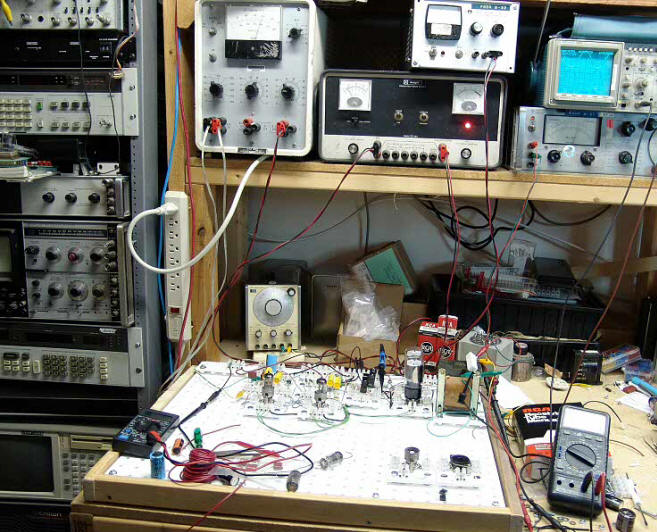 A 6AV5 P-P screen drive amplifier on Tubelab3
3 separate power supplies, so that everything can be individually optimized.
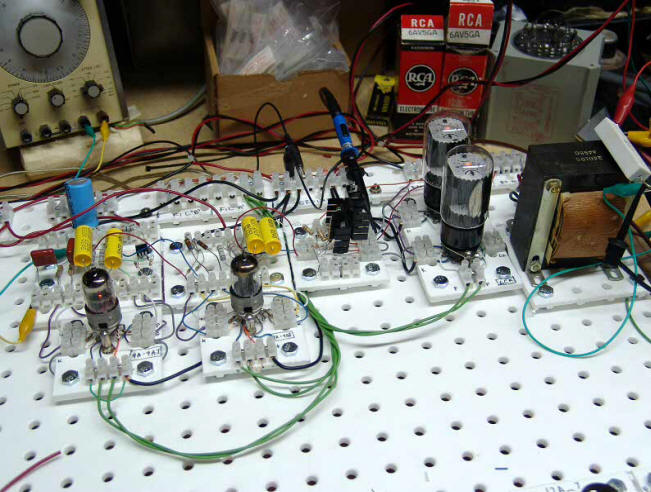 Individual modules contain 1 or 2 tubes, or several passive components
The large (1/4 - 20) bolts at each corner are just locating pins. They allow each module to drop into place, and prevent movement. All interconnections are made with "European - Style" Barrier strips that I got at Radio Shack. The small ones are # 274-680. These are used on all of the individual modules. I used a larger size for the strip across the rear of the main chassis that is used for all external power supply connections.
The white material is Nylon peg board that I got at Lowes (home improvement warehouse). It is made for mounting on the wall, and organizing tools. Hooks are usually placed in the holes. These are usually made of wood, but I chose the Nylon version because It would look better and last longer. Just make sure that the bolts that you use for the locating pins will fit through the holes. I mounted the peg board in a wooden frame for convenience when I need to move a completed design.
I will post complete construction details and more pictures shortly.
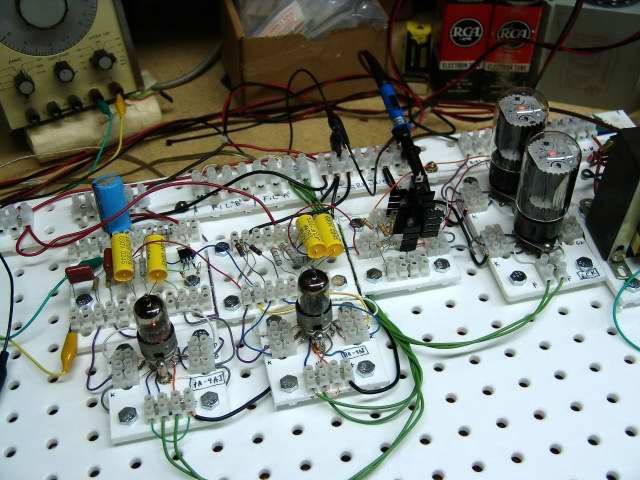
The Tubelab should never be operated around children, pets, or anyone that does not understand that touching a component could have lethal consequences. Once that "magical sounding" amp has been created, then the design should be mounted on a chassis or PC board in the conventional manner. The components used in the Tubelab prototype are easily removed for reuse in the permanent amplifier design. The Tubelab is then freed up for your next project.